


How to start seeds? Begin with good soil mix, water and light and go from there


This is a companion piece to my post on organizing your seed starting schedule. You can read that one by clicking here.
There are lots of ways to start seeds but all you really need is a bag of seed starting mix, water and light, plus a container to plant into.
Seed starting mixes are readily available at garden centers. Most are made from peat moss, which is sterile, holds water and provides a hospitable germinating medium. Many include pearlite, a naturally occurring substance that enhances soil aeration and aids root growth, or vermiculite, a mineral that improves water retention. Some will include fertilizer, though it’s not actually necessary for seedlings, which get most of their nutrients from their parent seeds.
You should avoid potting soil, which includes composted plant materials such as chopped wood bark that can make germination and early growth more difficult. Save that for replanting mature seedlings once they’ve established themselves. Don’t use topsoil or garden soil. It often includes clay, which is tough on young roots, and can carry pathogens that stymie germination.
There are real concerns about over harvesting peat bogs in the world, which can be a justification for avoiding products with peat moss in them. Many seed starting mixes now include coconut coir, a byproduct of the coconut industry made up of ground husks. It shares many of the same qualities as peat and will improve soil’s ability to retain water.
I’ll just say I tried using coir to start seeds a few years ago with mixed success. The plants didn’t germinate well and many were unhealthy when they did germinate. Studies indicate that salt used in coir processing may be the culprit. Garden talk show host Joe Lamp’l devoted a podcast to this a couple years ago. It’s worth listening to if you’re interested. Other alternatives are being developed but for now I still buy products with peat moss mixed in, figuring the amount used for starting seeds is miniscule compared with the overuse of peat moss in large scale agriculture and for fuel.
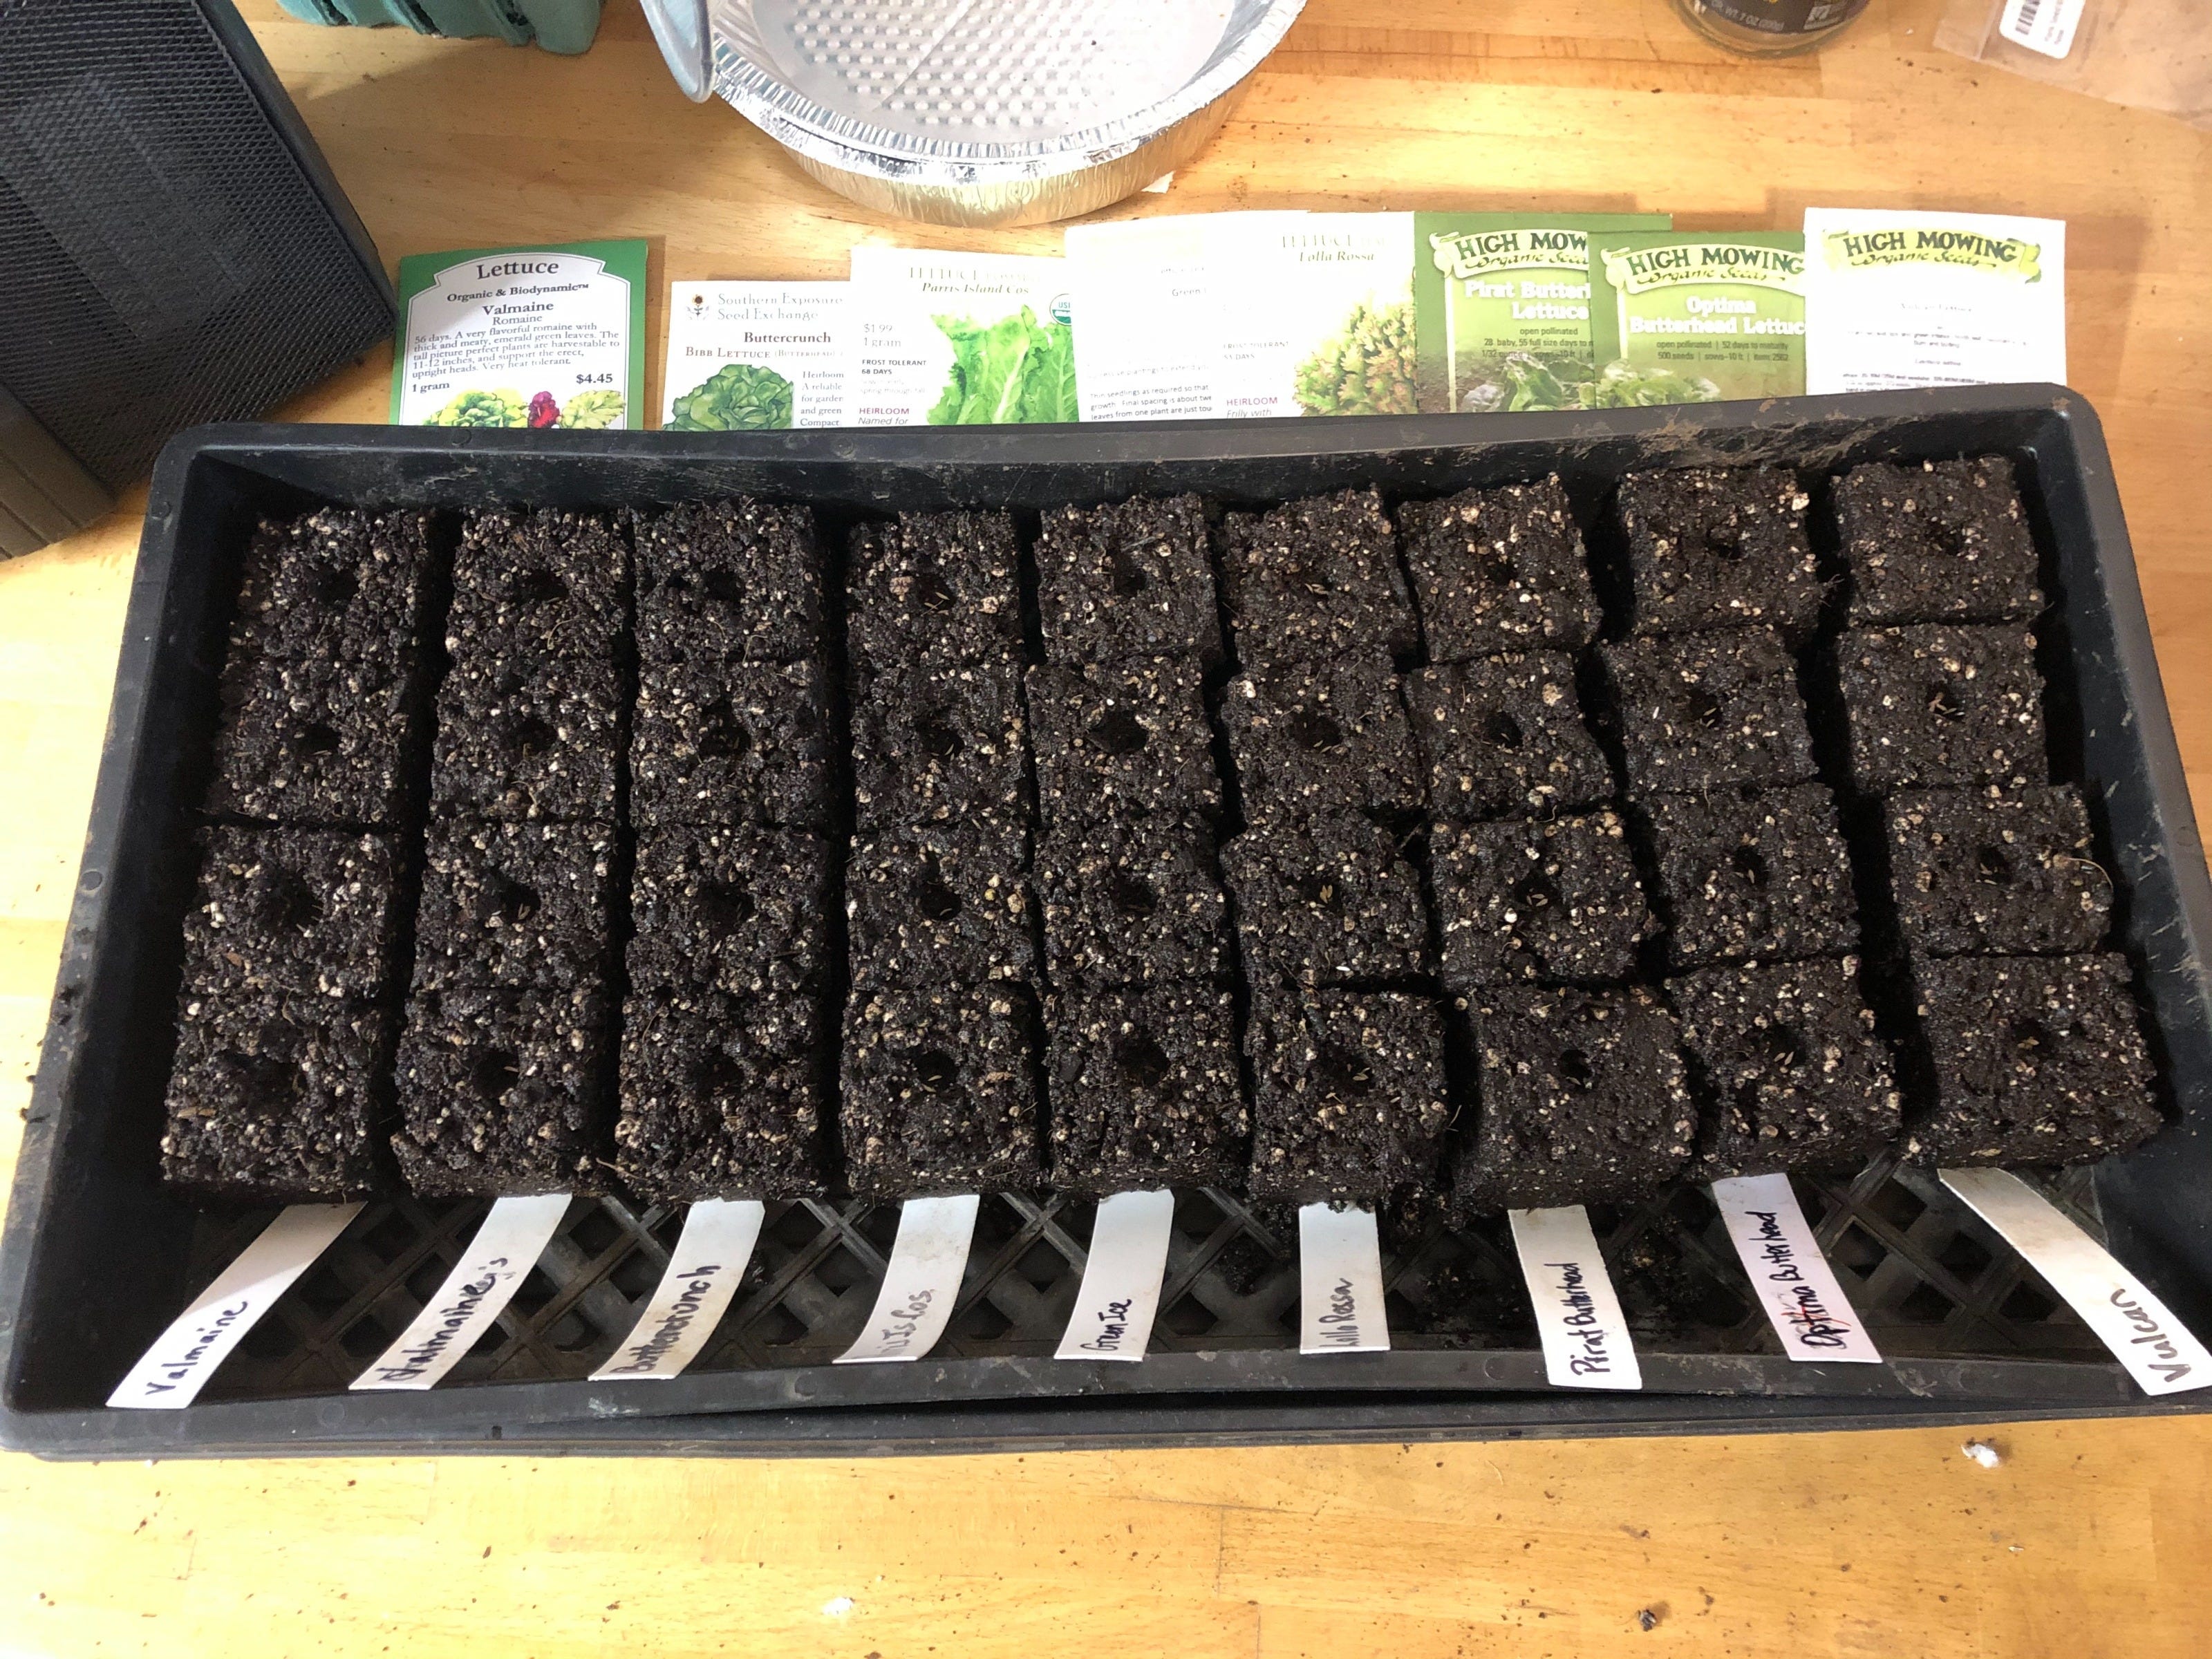
There are many suitable containers for starting seeds. I’ve used peat pellets, biodegradable peat pots, paper and plastic cups, plastic seed starting flats and takeout containers. I’ve also made my own soil blocks, which involves using a nifty device to compress moistened starting mix into sturdy cubes. You can use egg cartons and even build pots out of newspapers. The only requirement is that the containers be clean, have drainage holes at the bottom and not be too large, mainly because you’ll just be wasting soil.
After a few years of primarily using soil blocks, I’ve decided this year to go back to plastic seed starting flats. I’m not sure why. Maybe I just wanted to shake things up a bit. These flats are available at garden centers, often sold as kits along with bottom trays and plastic domes, or you can order them online. Johnny’s Selected Seeds has a good selection; so does Bootstrap Farmer. They come in various sizes but I’ve found that those with cells measuring about an inch and half to 2 inches square and 2-3 inches deep work best. They’re designed to fit inside standard 1020 plastic trays, which measure 11 by 21 inches. In addition to buying seed starting flats, you’ll want to buy an equal number of trays to give them support and hold water.
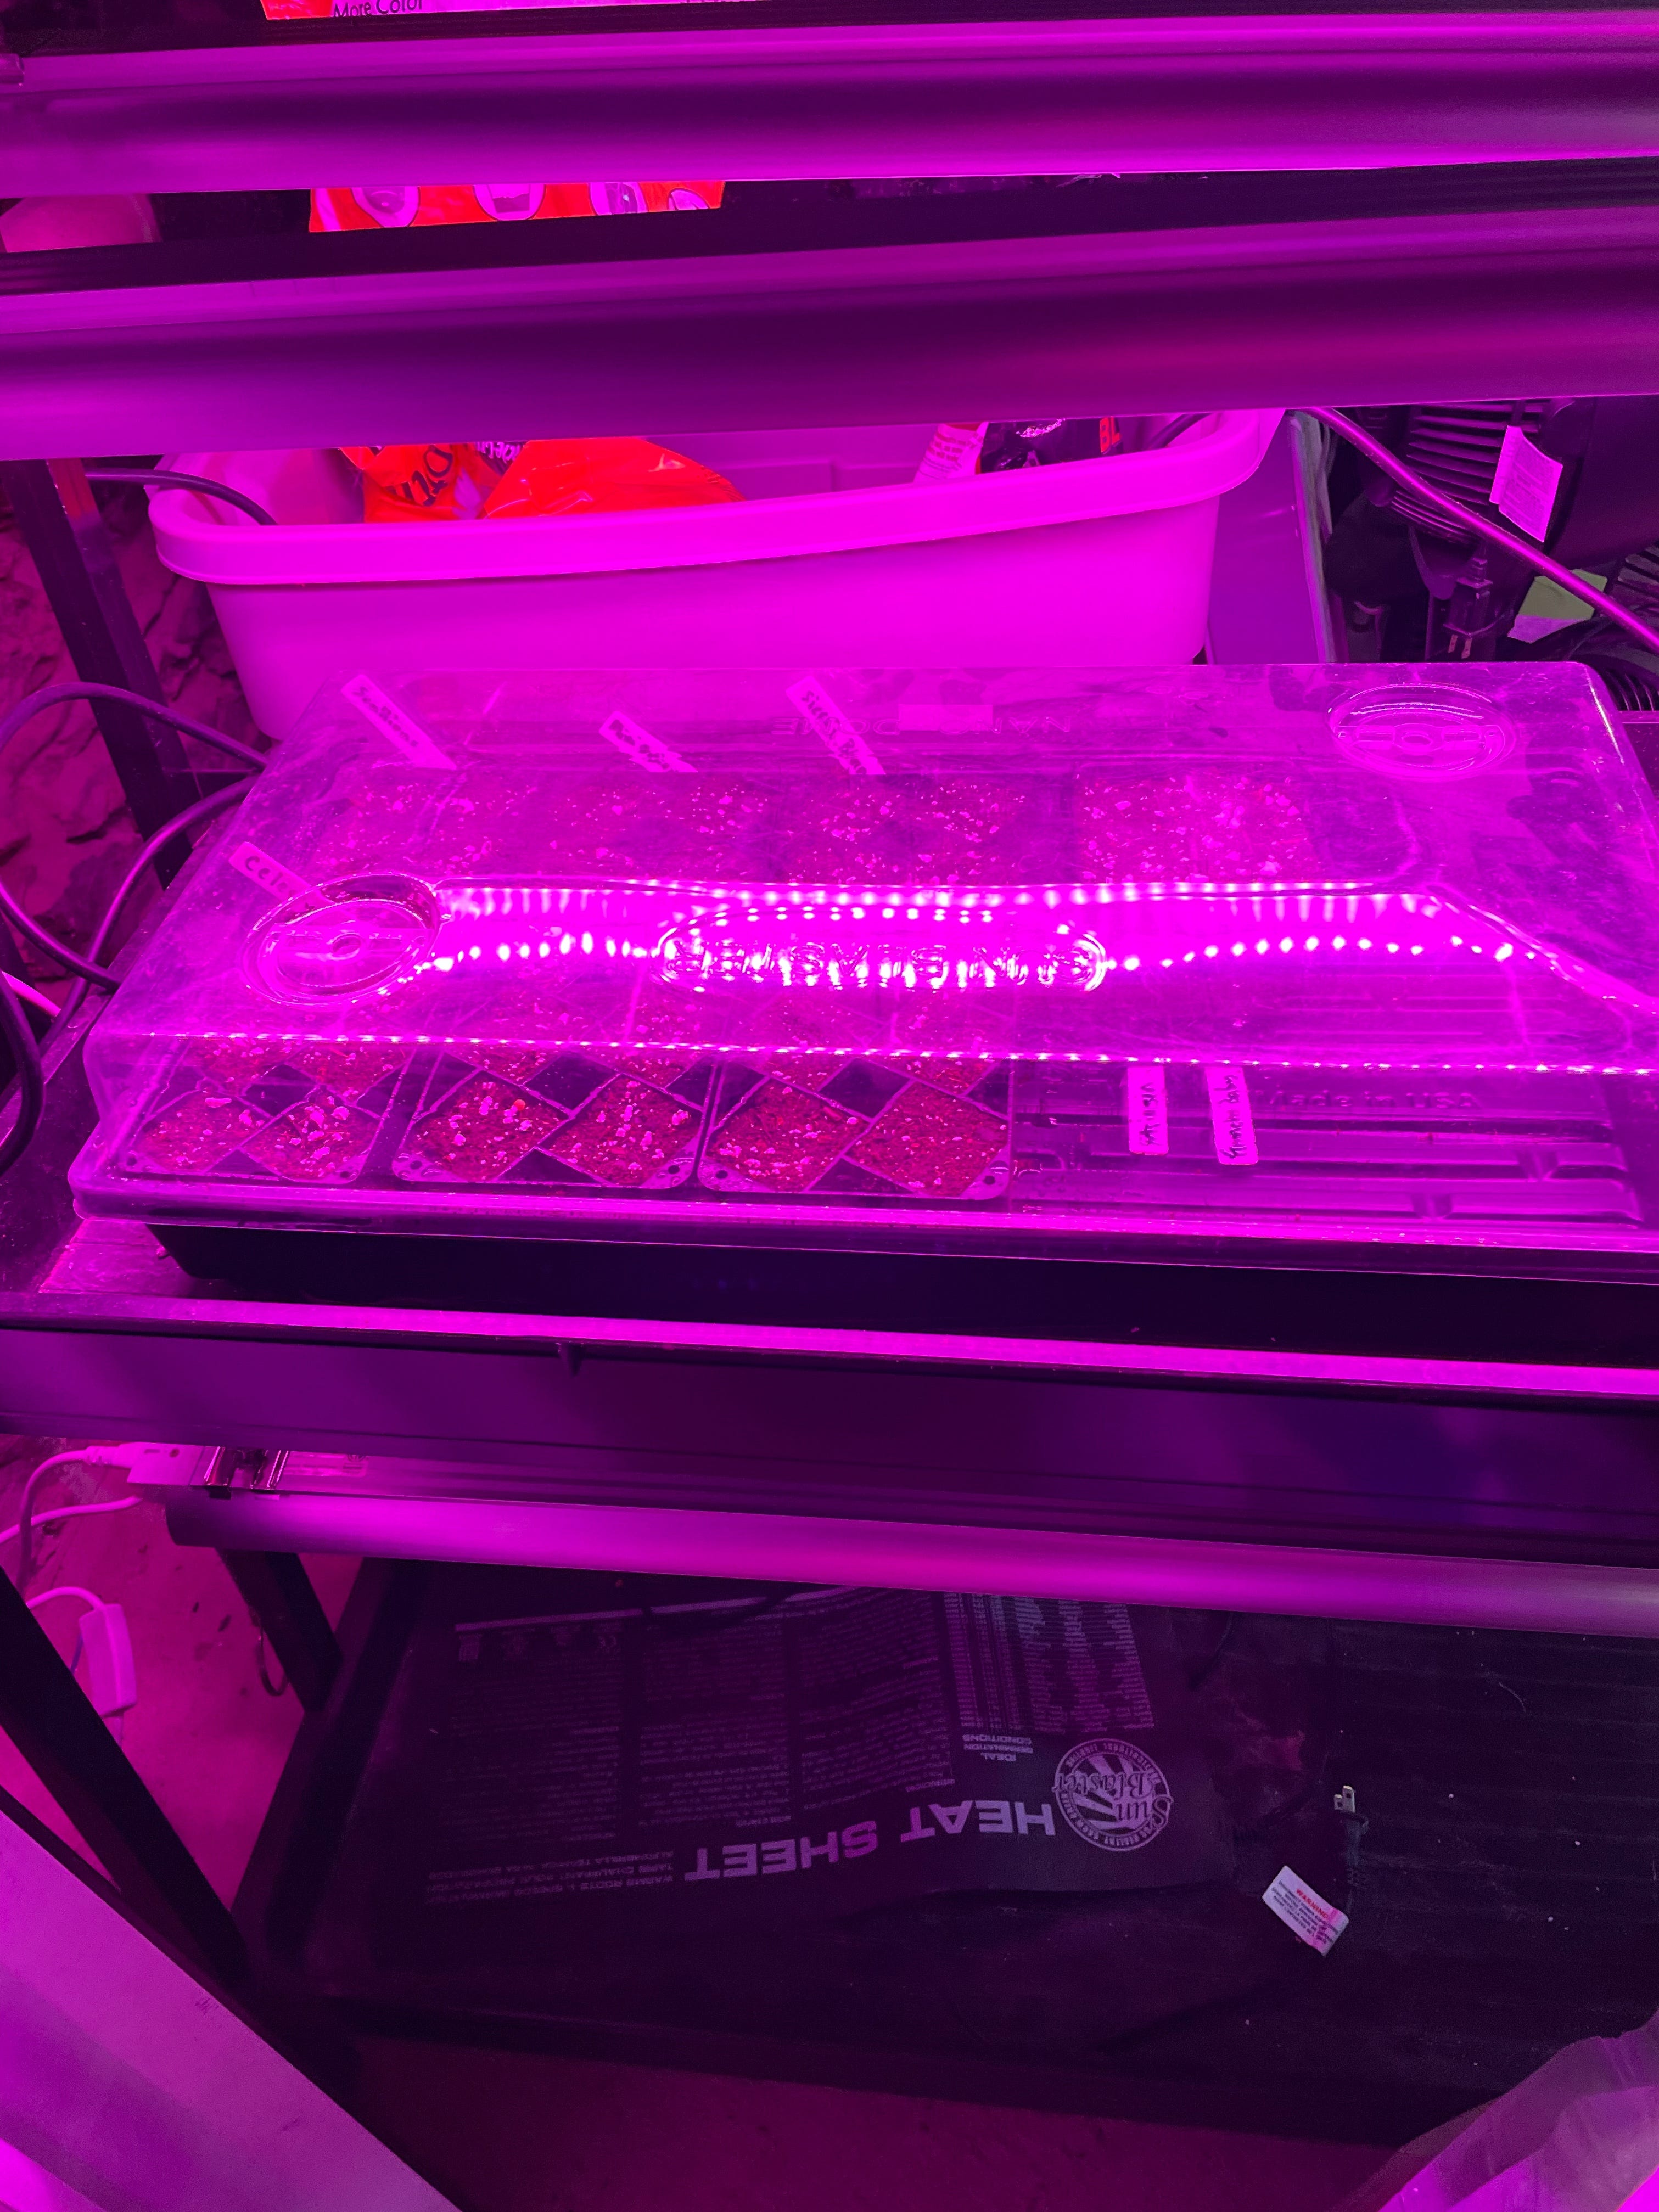
Once you have your starting mix and containers, you’ll want to find a table to place them on. Then think about lighting. When seedlings emerge they need light, lots of it. Placing a container on a sunny windowsill won’t do it. It’s best to buy fluorescent shop lights or LED light fixtures designed for growing plants that you can suspend over your seedling trays. Standard fluorescent bulbs work fine. I used them for years and didn’t buy the more expensive full-spectrum bulbs. LEDs, which have come down in price and are more energy efficient, emit a stronger, broad spectrum light that is perfect for young plants. I took the plunge a couple years ago and converted to LEDs. My first three fixtures cast a purple glow that for years was widely associated with clandestine weed growing. They emit the red and blue light on the spectrum that are crucial for plant growth. My second batch of LEDs included white spectrum light as well, and they’re much more pleasing to the eye.
In addition to water and light, most seeds need warmth to germinate. If you’re set up in a warm part of the house, that may be good enough. But for people like me who start seeds in a chilly basement, buying a seed germinating heat mat is a worthwhile investment. They’re like low-wattage heating pads, except thin and waterproof. You place the seed flats on top of the mats until the seeds germinate. Most seeds like to get going in soil that is around 70 degrees.
Now comes the fun part, which is sowing your seeds.
Start by moistening the seed starting mix. You can use a bucket or any similar container. I bought a plastic cat litter tray and devoted it exclusively to seed starting. Put some seed starting mix in the container and add water. You want to dampen the soil but not soak it. Once it’s moistened, fill your seed starting containers with it. Firmly press the soil into the containers, though don’t overpack it. Leave about a quarter inch at the top.
Next, note the recommended planting depth on the seed packets and plant your seeds. The general rule is to plant to a depth two to three times the size of the seed. I put about 2-3 seeds into each cell. Don’t forget to label them. Believe me, you’ll lose track of what you planted.
Mist the soil with water from a spray bottle, then cover the flat with either plastic wrap or one of the specially designed clear plastic domes sold for this purpose. What you’re creating is a mini-greenhouse that will be warm and moist, perfect for germinating seeds.
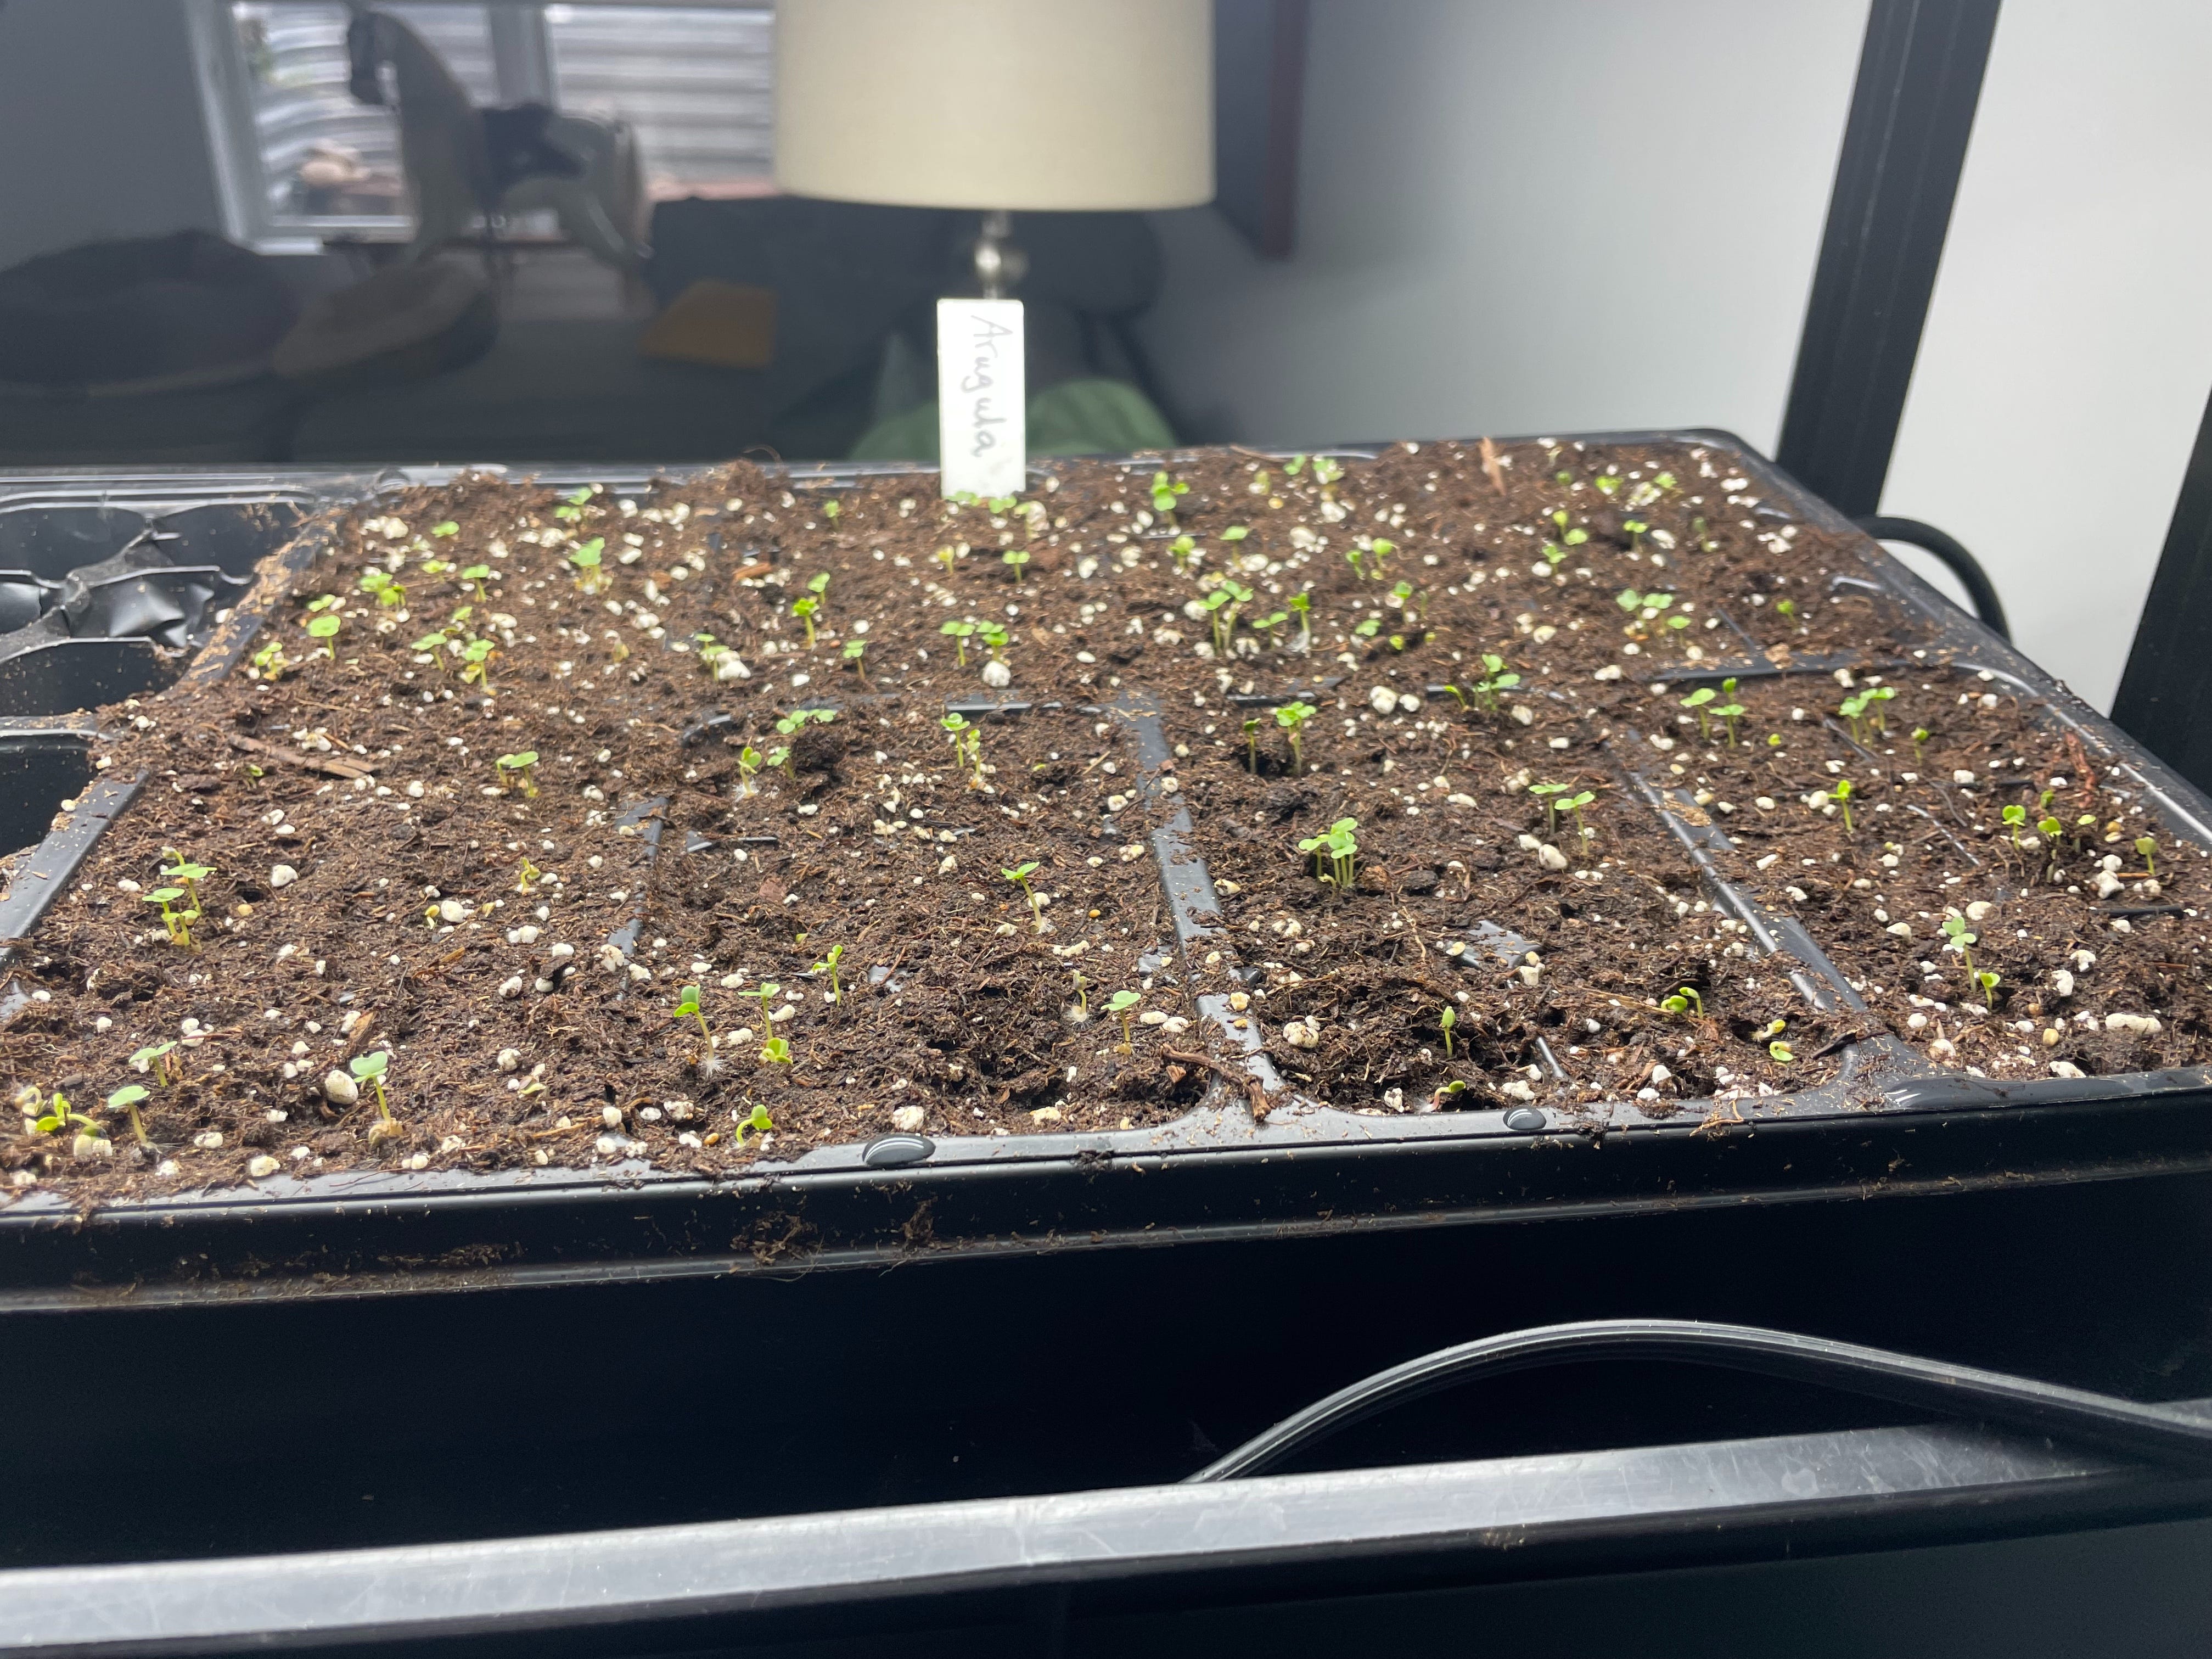
Although most seedlings don’t really need light until they emerge from the soil, I turn on the lights just after planting unless the seed packet says specifically that the seed needs darkness to germinate. It can take just a few days to a couple weeks for seeds to germinate; most seed packets include how long you should expect. Once the seedlings emerge, remove the plastic wrap or dome, turn off the seed starting heat mat if you're using one and they’re on their way. There’s no need to water the seedlings at this point.
From this point you need to keep your eye on two things. One is water. You shouldn’t let the soil dry out but equally important is you don’t want to over water. More young plants die from overwatering than under watering. Keep an eye on the soil and if it begins to dry, add water, either from the top, being careful not to splash water onto the delicate leaves, or ideally from the bottom by filling the tray with about a quarter to a third of an inch of water. The water will soak upwards from the bottom into the soil. If you’ve added too much water, don’t let it sit in the tray. Pour it out. Tender young roots don’t like to sit in overly saturated soil.
The other is light. Young seedlings growing indoors need about 16 hours of light a day, so it’s a good idea to buy a standard wall timer and plug the lights into it. You also should keep an eye on the height of your lights. Fluorescent bulbs, which are weaker than LEDs, should be suspended about 2-3 inches above the plants, no higher. Raise them as the plants grow. LEDs are more powerful and have different strengths. A good rule of thumb is to suspend them about 8-12 inches above the seedlings at the outset, raising them as needed.
You’ll want to thin the cells to one plant each after they emerge and put out their first set of “true leaves,” which usually are the second pair of leaves to emerge from the stem. It’s safer to use small scissors to do your thinning by carefully snipping the extra stems near the soil than pulling the seedlings out, which could disturb the root system. As the plants grow, feel free to add a small amount of diluted liquid fertilizer every couple weeks.
There are many, many fabulous books available that go into great detail about seed starting methods, equipment, techniques and planting schedules. I’ve learned from all of them, as well as from years of trial and error on my own. I reviewed a bunch of my favorite gardening books last year, and you can read about them in this post as well as this one.
Here are four that I’ve found particularly useful.
The Vegetable Gardening Book, By Joe Lamp’l
The Year-round Vegetable Gardener. By Niki Jabbour
Plant Grow Harvest Repeat. By Meg Cowden
The Vegetable Gardener’s Bible. By Edward C. Smith
Here’s a selection of other recent posts:
How to grow microgreens, and why they’re good for you