

How my driveway became a tomato Eden
How my driveway became a tomato Eden
Some may have thought it unsightly, but that's where the sun was


Back in suburban Washington, my driveway was my garden. It was a little weird, but here’s the thing. I love to grow tomatoes along with their nightshade cousins like eggplant and peppers. To me, these are the heart and soul of the summer garden. But to thrive they need one thing I dearly lacked: lots and lots of sun.
When we moved to the house in 2018 – a five-block move in the same town that allowed us a modest change of scenery and a smaller footprint to manage – we identified one spot on our lot where sunlight managed to make its way past the limbs of a massive oak that towered over our home and shaded about 90 percent of the 6,000-square-foot lot. It was there, perched above the driveway, that we built four raised vegetable beds, two measuring 3 by 8 feet and two 3 by 5.
As it turned out the beds got maybe 5-6 hours of sunlight a day. This made them a pretty good place to grow lettuce and brassicas like kale and spinach, which can actually benefit from a little shade, especially in the withering heat and humidity of the Mid-Atlantic. But when I planted tomatoes that first summer I learned what admittedly I already knew but was reluctant to admit: There wasn’t enough light. Fruit production was okay but not what I’d hoped for.
Luckily one of life’s chance encounters provided me with a way out of my dilemma. It was a virtual encounter via a podcast and it introduced me to tomato guru Craig LeHoullier. Craig for years had successfully grown a forest of tomatoes of all varieties in his driveway in Raleigh, NC. He had them in grow bags, pots and straw bales, strategically arrayed in the sunniest spot at his home, which happened to be on the pavement just outside his garage doors. This was no simple patio garden. Craig produced juicy heirlooms of all shapes and colors, the kind you can find at the best farmers’ markets and roadside stands.
It dawned on me that the sunniest spot on my property was my driveway as well. It sat just below my four little raised beds, next to my house and a convenient outdoor faucet and hose. Of course this meant turning the driveway over to dirt-filled grow bags, shovels, trowels, potting soil and peat moss, along with tumblers filled with rotting compost. We parked our car in the street, which was okay since it was an urban neighborhood, its streets lined with both trees and parked cars. It was beautiful but not obsessed with carefully manicured front lawns. A neighbor and good friend had a fabulous vegetable garden, replete with numerous raised beds, apple trees, blueberry bushes and a strawberry patch that consumed most of his property. He even grew his own hops for a fantastic home-brewed beer. There are limits, though. One year he built a really nice potting bench and installed it right next to his front door. He and I thought it was perfect and very handy. I really wanted one too. My wish finally came true when his wife made him give it away (to me) because she had grown tired of it. It’s now in my garden here in the Berkshires.
One more story about my driveway garden before I get into the details. When we decided to sell our house last year our real estate agent told us how gorgeous it was and how prospective buyers would love it. Except, she said, looking directly at me, your driveway. I got my order: move all of that garden stuff before we put it on the market. I willingly restored the driveway to its prior, everyman, appearance.
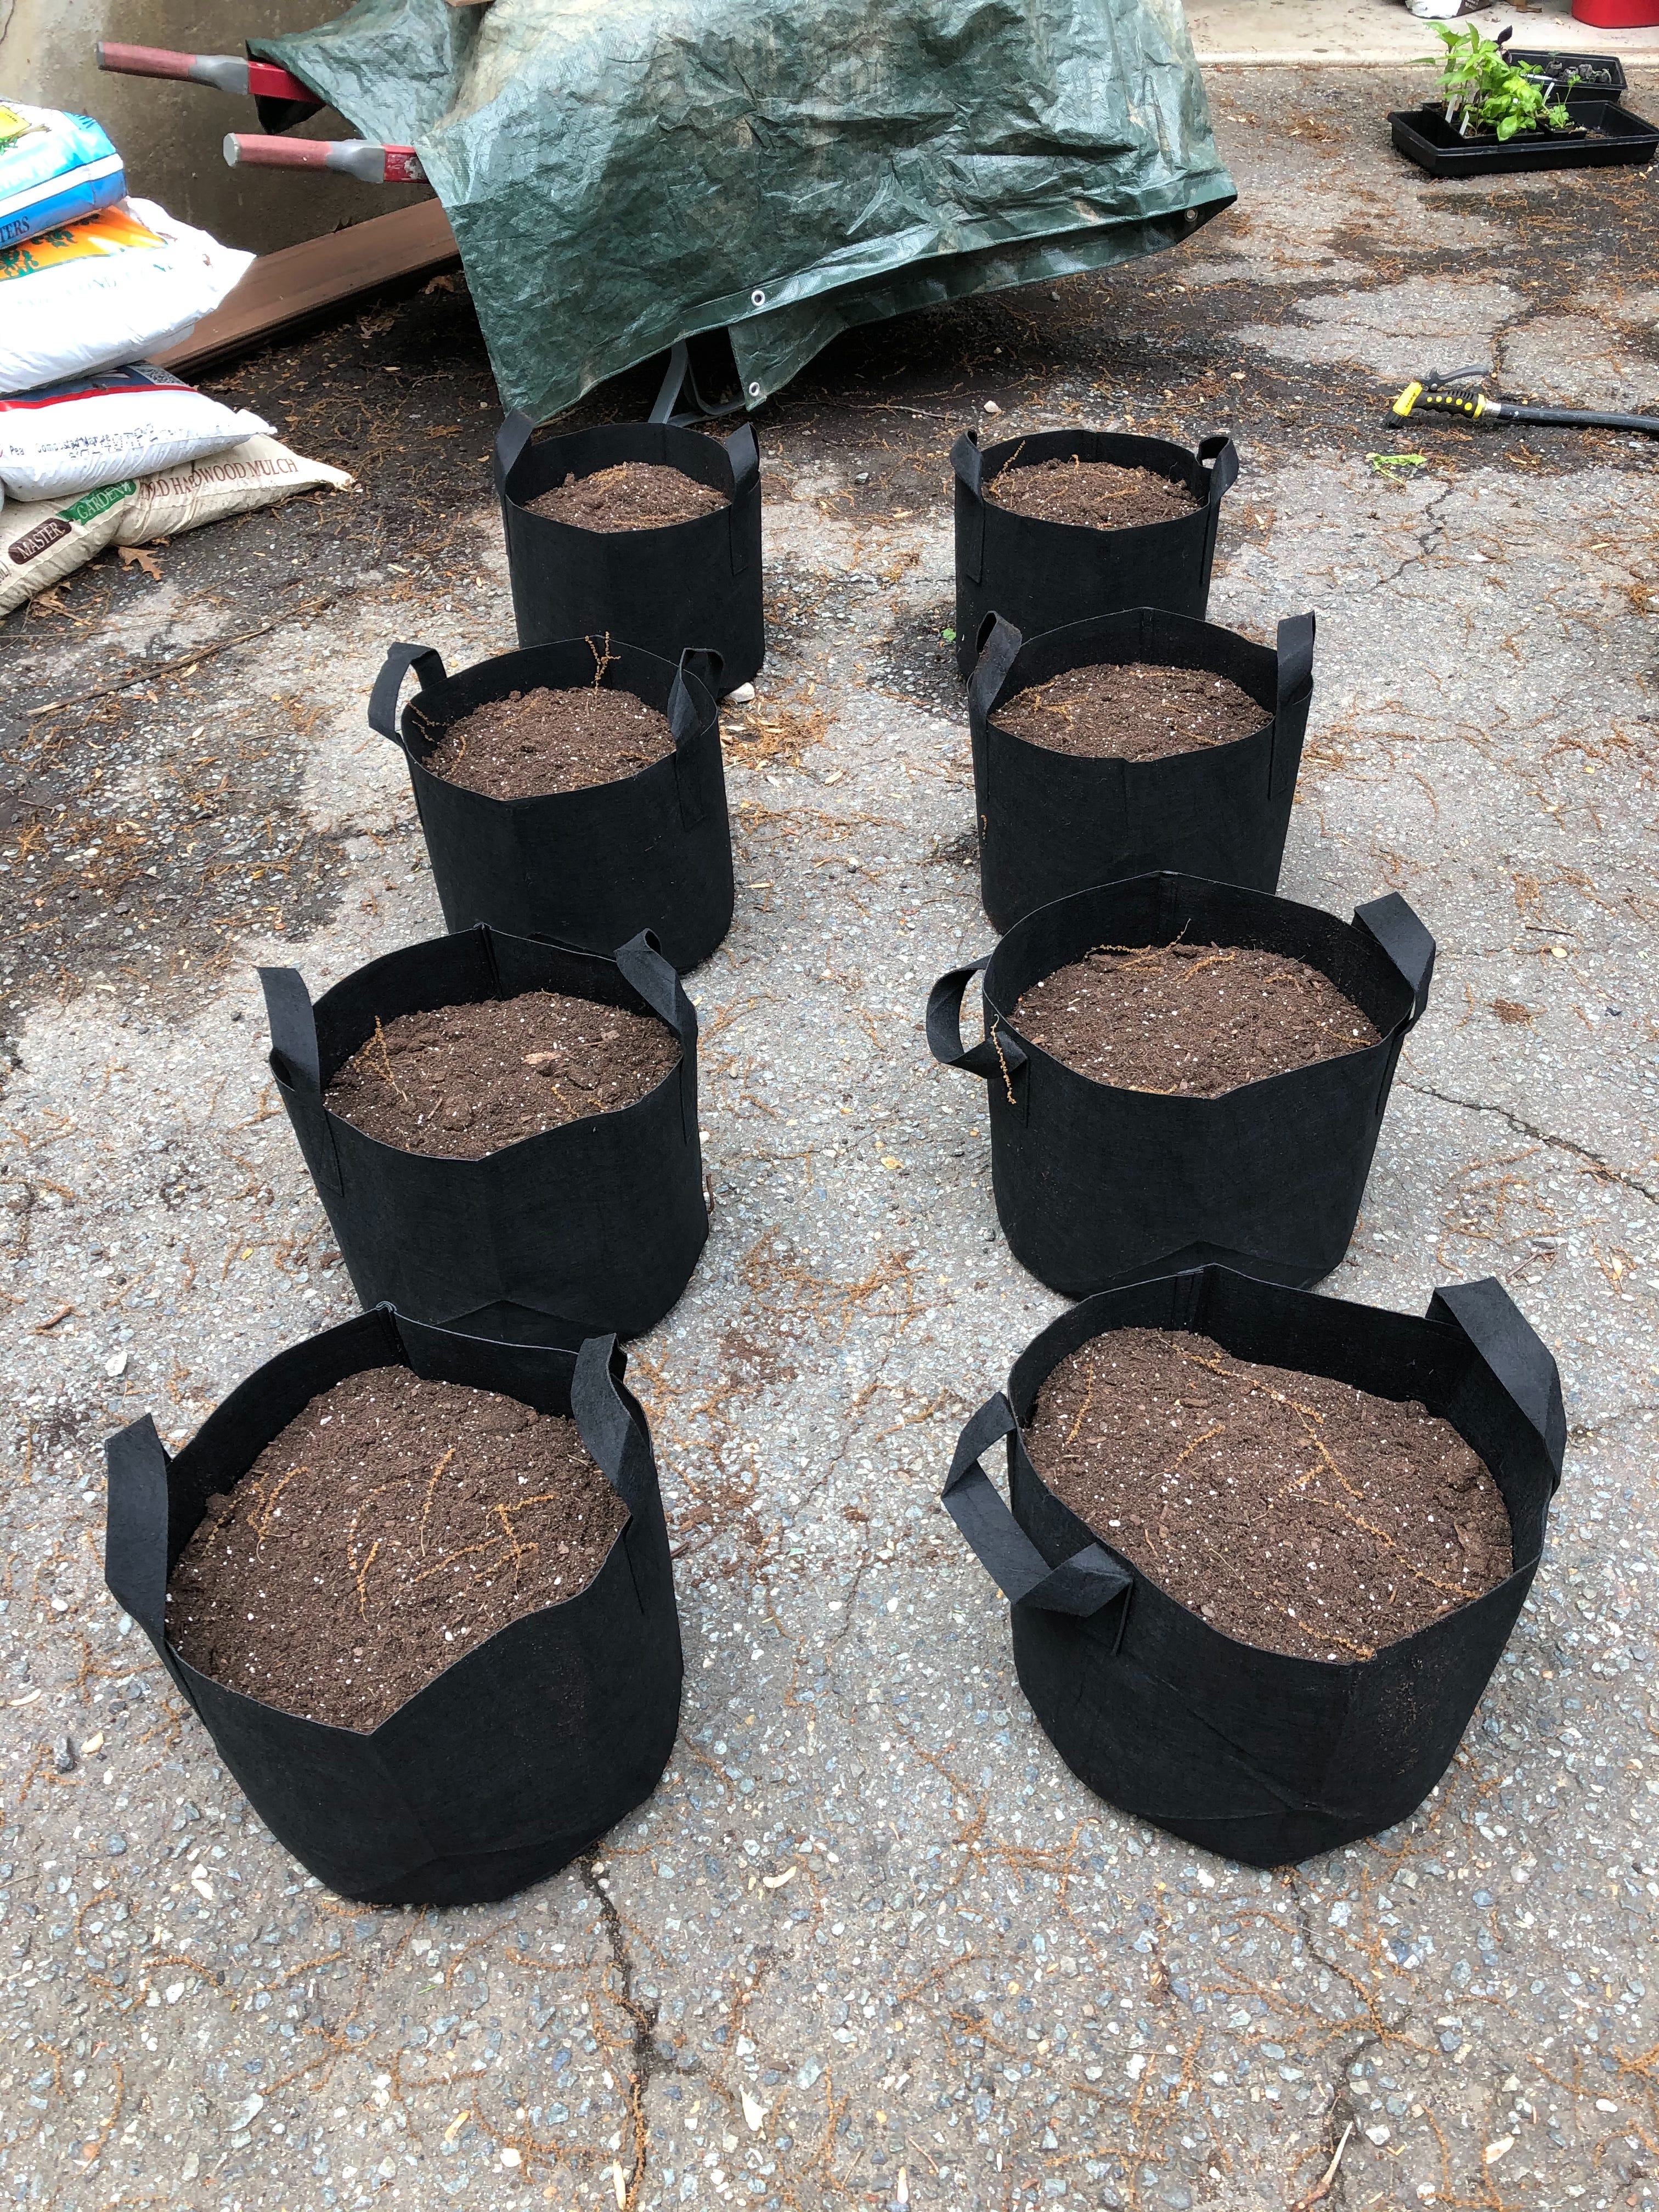
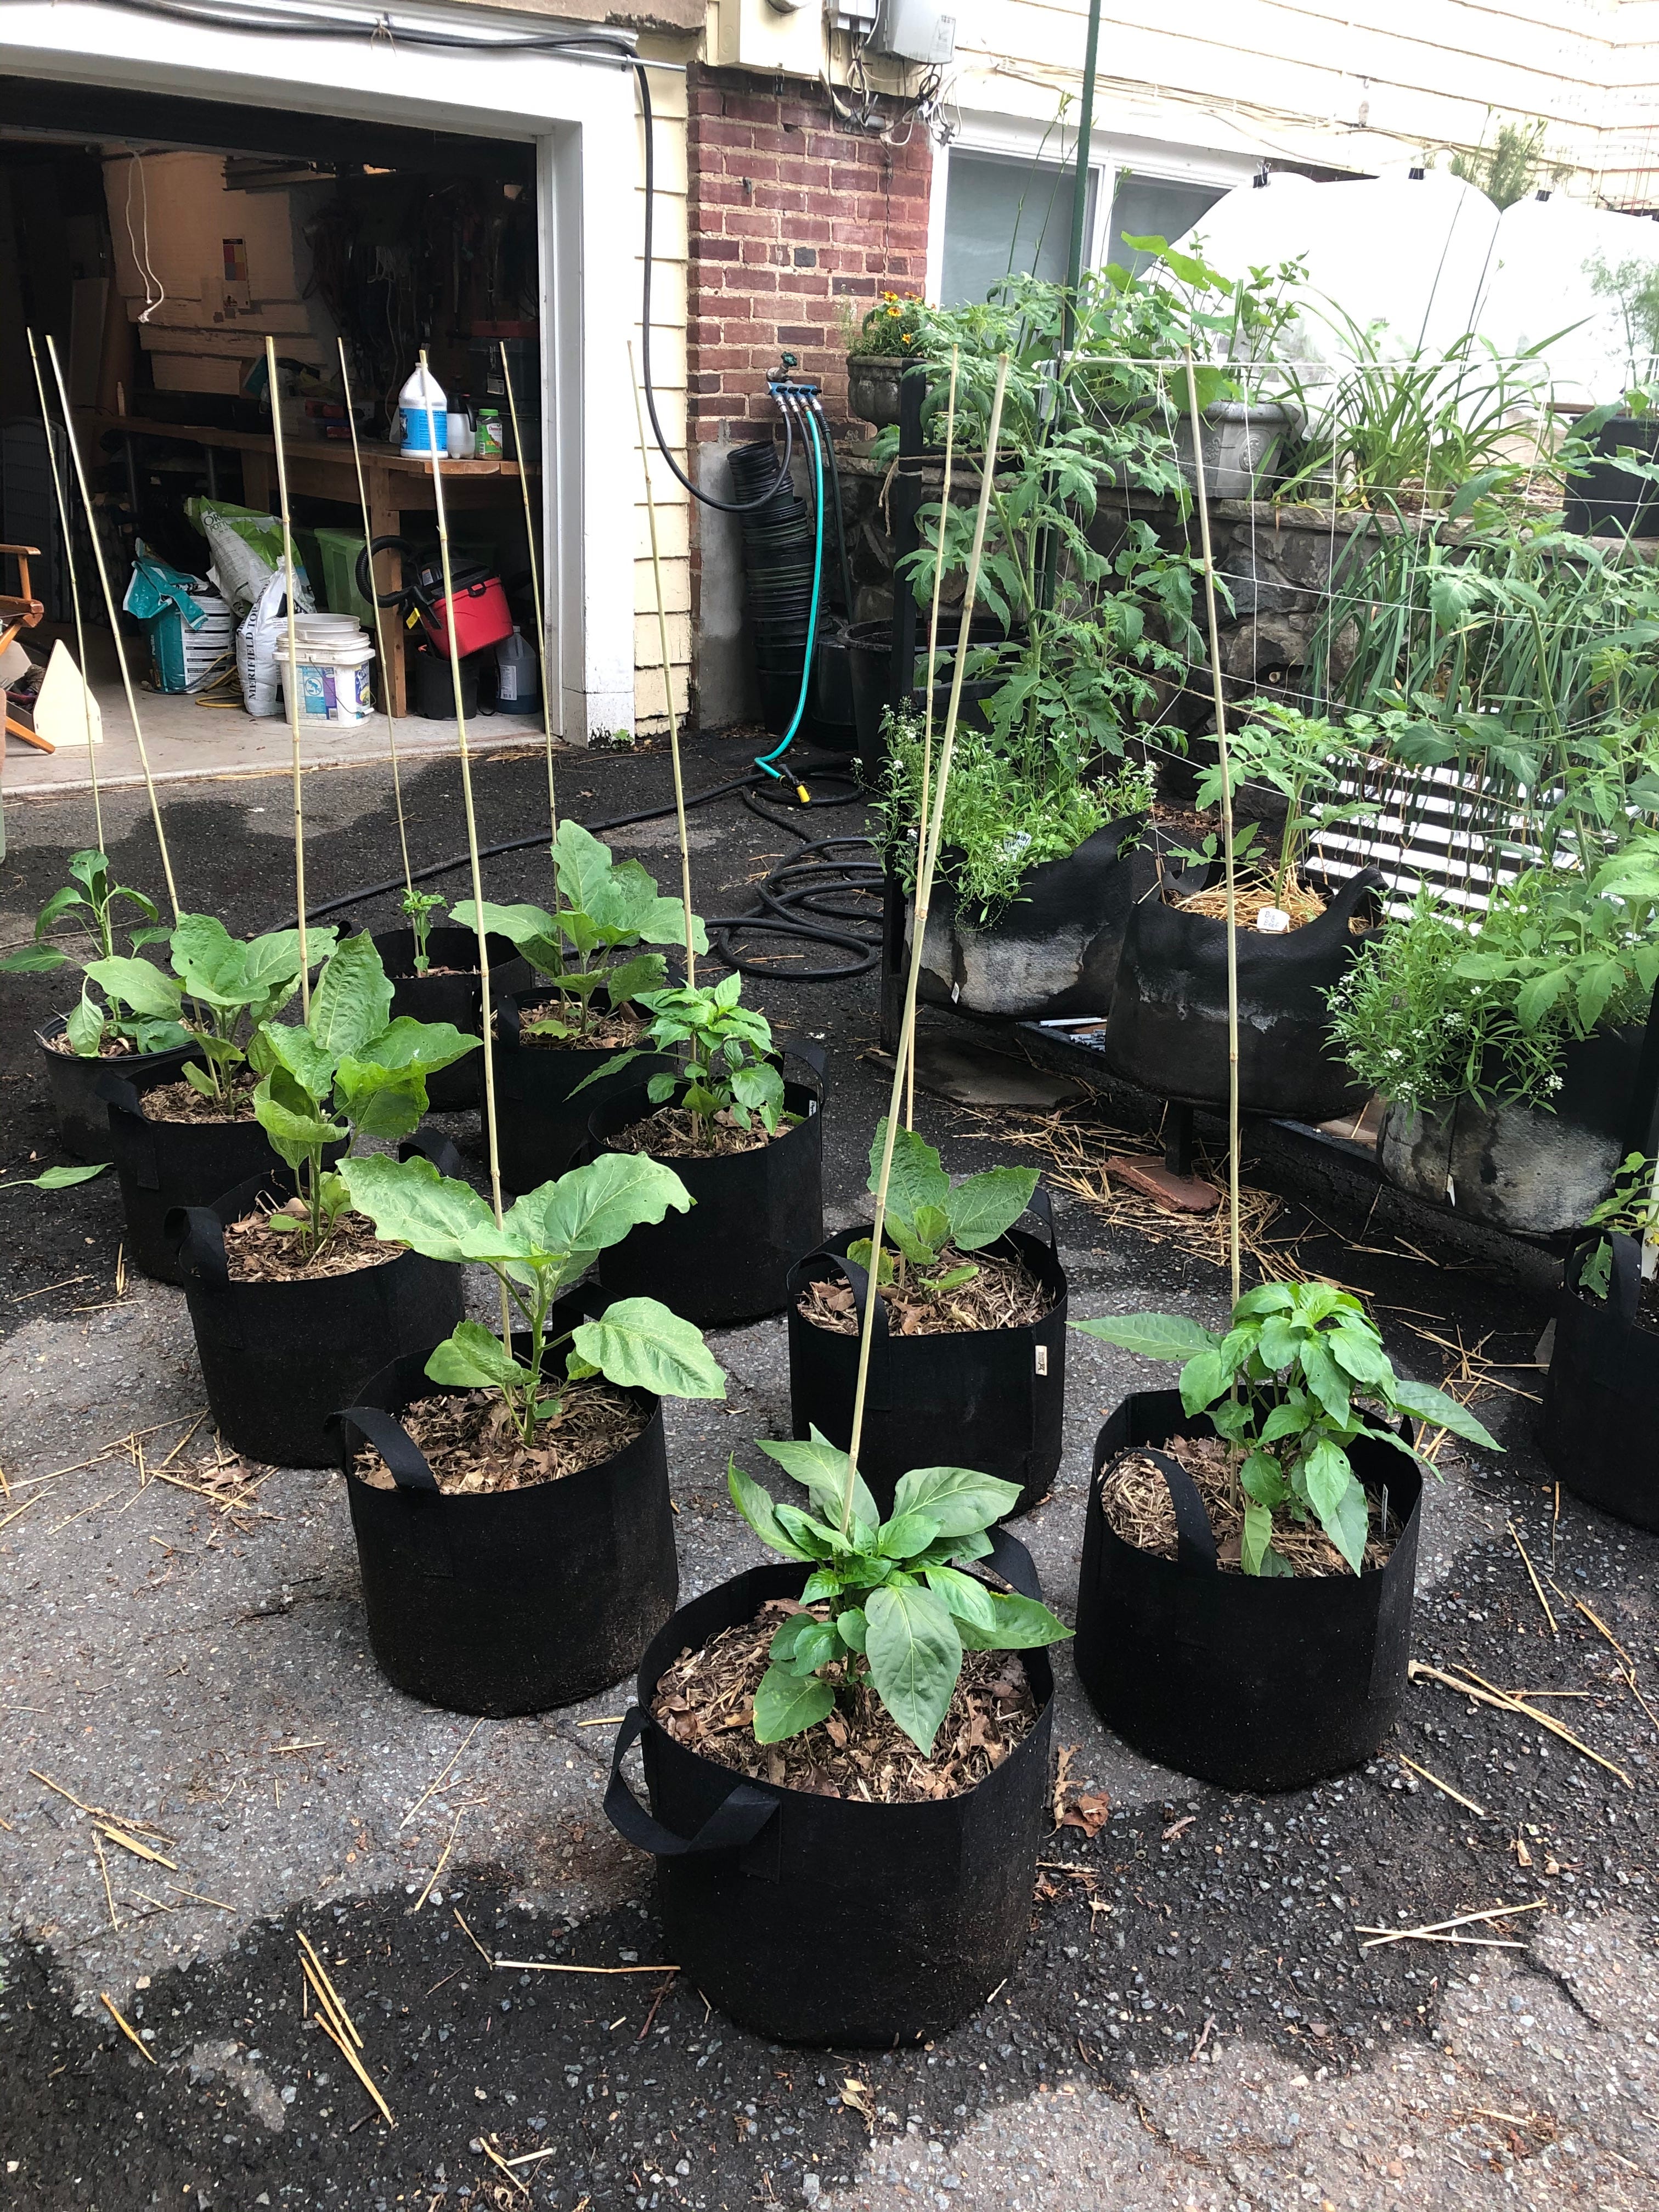
It wasn’t as if I was dismantling anything that had required much effort. Turning the driveway into a garden a few years earlier had been easy. All I really needed was some grow bags and dirt. I drew a plan, with designated spots for each of my containers arranged in neat little rows, carefully aligned for maximum sun exposure. And it worked. For the next three years I produced a fabulous crop of tomatoes, eggplants and peppers. All it took was a little planning and some regular watering and fertilizing.
A little twist was my introduction, again through Craig LeHoullier, to dwarf tomatoes, which I mentioned recently when I reviewed Craig’s popular book Growing Epic Tomatoes. Dwarfs are small in stature, growing just three to four feet tall, but mighty in production. Since they don’t ramble like indeterminate tomatoes, they’re easily contained inside tomato cages or with stakes, even when growing out of a container in your driveway. I grew dwarfs and indeterminates and had success with both. You can also grow dwarf tomatoes in containers on a sunny patio, deck or balcony. If you’re interested, the Victory Seed Company has what may be the largest selection of dwarf tomato seeds anywhere.
You can grow a tomato successfully out of almost any container made out of porous material or with holes in the bottom. I used grow bags because they’re cheap, portable and store easily in winter. Grow bags are made from polypropylene, a kind of heavy-duty landscape fabric. They come in a variety of sizes and colors and are available online and in nurseries. I used 10- and 5-gallon sized bags, which were adequate for both larger tomatoes as well as eggplants and peppers, though you can go bigger if you want.
It’s important to fill the grow bags with a good quality potting soil mix, which you can buy in large bags at nurseries or box stores. Or you can make your own by mixing one-third compost, one-third good quality garden soil and one-third peat moss or coir, along with a dollop of perlite or coarse sand to help with aeration. The pots do require regular watering. To be safe, I watered mine each morning before leaving for work, counting to 10 as I held a watering wand over each container, avoiding splashing the tomato vine leaves. With 6-10 tomatoes, and about the same number of eggplants and peppers, it didn’t take more than a few minutes and it actually was a nice meditative time before the day began in earnest. Regular watering is important because the soil in a container will dry out more quickly than soil in the ground, especially when it’s sitting on pavement. The nice thing about grow bags though is any excess water just runs out, so you don’t need to worry about over-watering. Once a week I added some liquid fertilizer to a watering can and watered each pot.
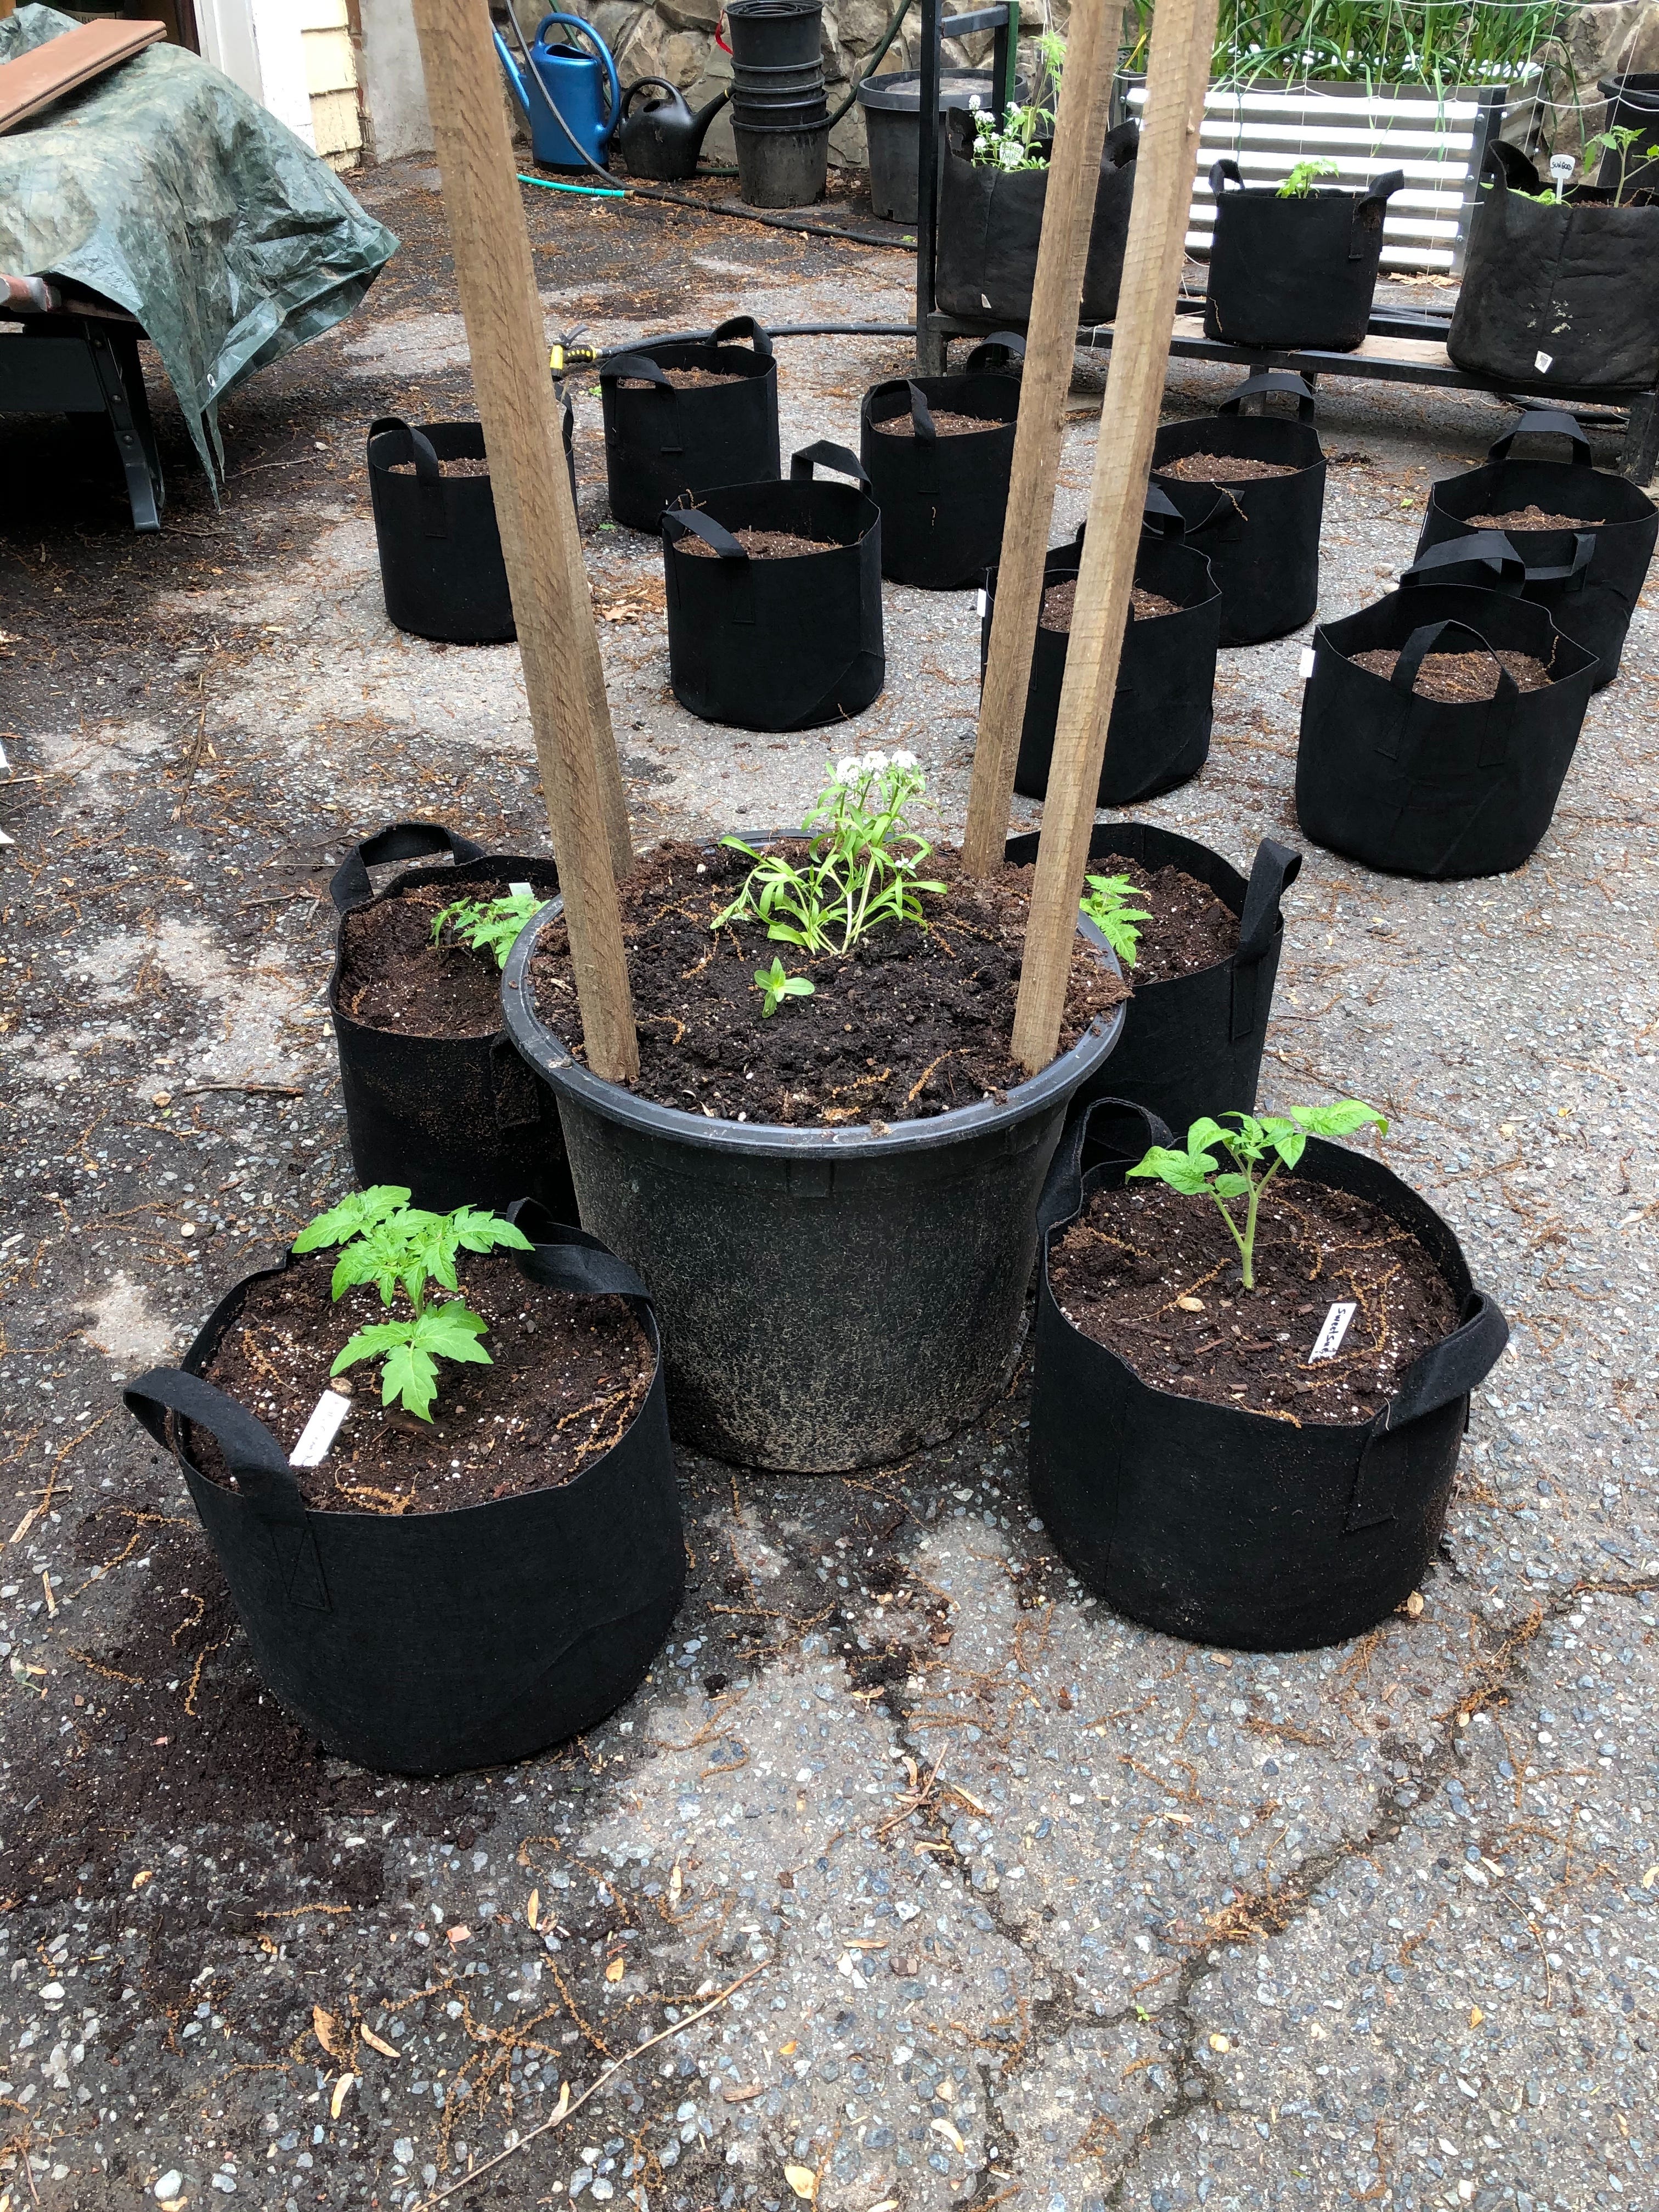
Staking the plants can be tricky. For dwarf tomatoes, eggplants and peppers, standard tomato cages work fine. The challenge comes with indeterminate tomatoes, whose vines can grow to unseemly lengths over the course of the summer. Regular pruning and topping once the tomato grows to an adequate height helps. Otherwise, it can be useful to create a system for staking the larger tomatoes, either by arranging the pots alongside the lawn or a garden bed. Having neither, I ended up packing large plastic containers – the kind trees come in – with heavy soil, then putting wooden stakes into them. I arranged four grow bags in a circle around each pot, and used the central stake to support the tomatoes in them. It was a bit jerry-rigged but it worked.
Writing all this about growing tomatoes makes my mouth water for one of the real joys of summer, which is eating them. But we’re still a couple months away from the start of the harvest, so I’ll store up some of my favorite tomato recipes until then.
For now, please reach out with any questions you may have about container gardening or dwarf tomatoes, or anything else related to your home gardens. I’d love to hear from you.